Compass Science: Compass optimized for different regions

Posted by Jan Kocbach, 11 Aug 2011@22:00

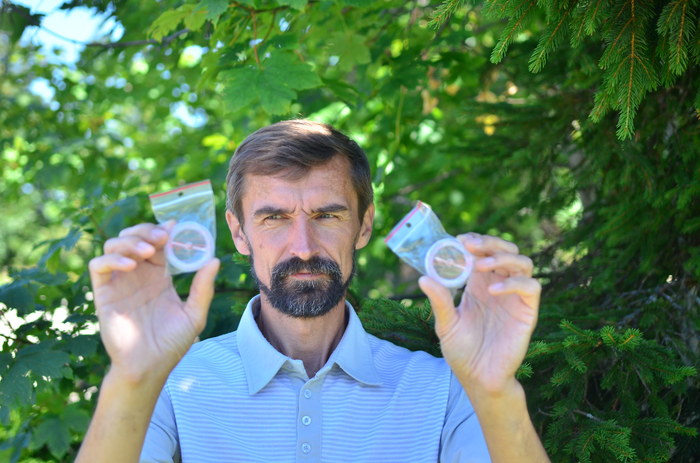
compassesDid you know that a normal top-of-the-line Moscow Compass has poorer performance in the WOC 2011-area in France than in Scandinavia or further north in Europe? And that you can actually buy a compass which is optimized for the WOC area in France? It was new for me until I talked to a developer for Moscow Compass at the Model event for WOC 2011 long distance today.

- We had a special version for WOC in Trondheim optimized for northern Norway, Sweden and Finland last year. It was used by many in the Swiss team and also several of the Russians like Khramov and Tsvetskov, Fedor Polekshanov explains.

- Now we have a special version for the WOC 2011 area which is optimized for the France, Switzerland and Italy region. Many WOC runners have the compass – for example Marc Lauenstein, Philippe Adamski, Fabian Hertner.

Does it really work?

I was very surprised to hear about this – as this was very new to me. So does it really work? I first asked Jonn Are Myhren – a WOC runner who has been using this type of compass – and he was very satisfied with it. I then got to compare one compass optimized for this region with a “normal” Moscow compass which is very stable in other areas (and also tested against my own compass) – and there was really a difference. See this short video for a demonstration:

I also got a demonstration with a compass optimized for Australia – and here the effect was even stronger.

Why does it work?

- The magnetic field is not horizontal. The vertical component of the magnetic field influences on how long time it takes before the compass needle stabilizes, the Polekshanov explains while showing me several different compasses optimized for different areas.

- The change in stability is not important for all runners, but for elite runners this can be very important.

- The vertical component affects the horizontal plane of the compass card and pulls it to dip towards North or South. This natural force varies according to geographical location. A compass balanced in Moscow is not horizontal in France.

The “secret” behind designing the compass is very simple. The center position of the needle is just offset a tiny bit based on where in the world the compass is to be optimized for – except for that they are equal as far as I understood.

Something for you?

So is this something for you? Should you have 4-5 different compasses when traveling the world for orienteering events? Probably not – but I’d recommend trying it out and see if it is something for you. I was so impressed that I bought one for my girlfriend to try out during the races here in France…

I have not compared this with other compasses – like for example Silva compasses – so I can’t say anything about how the Moscow Compass technology is compared to the top-of-the-line compasses from Silva or Suunto.

OOCup 2011 Day 3: GPS Analysis

Posted by Jan Kocbach, 25 Jul 2011@18:30

themape
The third day of OOCup 2011 offered some really interesting orienteering. – Some of the most tricky orienteering I have experienced, was the comment of one former world champion. The terrain is very technical with a lot of micro-routechoices, and also some longer route choice legs.

For this GPS-analysis I have got routes of 5 runners, and in addition I have talked to several of the other top runners about their routes. I would have like to have more GPS-routes to make a full analysis, but several of the top runners did not use a GPS-watch – and some also forgot to start their watch. Still I think there is enough information to make an interesting analysis. Please add a comment below if you have any comments to the analysis.

Before you start reading, you can take a look at the complete map here.

Start-2

Quiet before the storm. Quite easy orienteering – no big differences between the top runners. Tue Lassen is fastest and takes the lead (keeping it all the way to the fifth control). The winner Marius Thrane Ödum and number two Roger Casal Fernandez loose some seconds. Here is the map without routes:

Split times Start-1
1. 02:04 Tue Lassen (3.)
2. 02:14 Marius Thrane Odum (1.)
3. 02:19 Alasdair McLeod (6.)
4. 02:22 Bjarne Friedrichs (7.)
5. 02:23 Mate Kerenyi (15.)
8. 02:28 Roger Casal Fernandez (2.)
12. 02:32 Zsolt Lenkei (4.)
13. 02:34 Doug Tullie (5.)

Split times 1-2
1. 01:41 Christian Christensen (17.)
2. 01:41 Doug Tullie (5.)
3. 01:42 Marius Thrane Odum (1.)
4. 01:42 Tue Lassen (3.)
5. 01:44 Bjarne Friedrichs (7.)
6. 01:44 Roger Casal Fernandez (2.)
8. 01:49 Zsolt Lenkei (4.)
11. 01:52 Alasdair McLeod (6.)

2-3

At the long leg to number three the interesting part of the course starts. This is an interesting long leg with several route choice options. Incidentally, the different options are actually quite similar in running time – the important thing here is to execute the leg well.

Here is the leg without routes:

Below you see the leg with routes (there is some inaccuracy for the GPS-signals in this part of the map due to the steep hill).

Note that the actual split time from the SI timekeeping system is show in the parantheses, whereas the split time from the GPS is shown first.

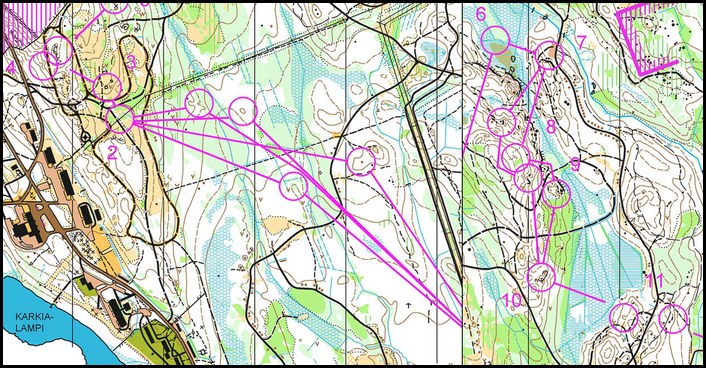
Fastest of the ones with GPS-route here is Zsolt Lenkei going right. However, I have also part of the route of Roger Casal Fernandez (his route starts halfways up the hill), and Casal Fernandez is 3 seconds faster than Lenkei with a route similar to Friedrichs. Another 5 seconds faster is Søren Schwartz who is the fastest on this leg, but I do not know where he ran.

Split times 2-3
1. 06:45 Soren Schwartz (11.)
2. 06:50 Roger Casal Fernandez (2.)
3. 06:53 Zsolt Lenkei (4.)
4. 06:57 Tue Lassen (3.)
5. 07:00 Alasdair McLeod (6.)
8. 07:12 Marius Thrane Odum (1.)
9. 07:14 Doug Tullie (5.)

The winner of the race, Marius Thrane Ödum runs an even more left variant than Friedrichs, using even more paths towards the control. – I learned in France in similar terrain that I should keep in the paths as much as possible, Ödum commented after the race. Ödum looses 27 seconds to the best time on this leg.

Conclusion for this leg: Approximately the same to go direct or right – execution of the leg is the important thing.

3-4

Now we are into the tricky terrain – some of the most tricky the competitors will meet in OOCup this year. This is not necessarily terrain where you win the race by doing a few fantastic split times, but rather terrain where a lot of competitors loose the race by doing big mistakes.

- Thierry Gueorgiou really liked this terrain because there are so many micro-routechoice options, the head organizer Ivan Nagy commented about this part of todays terrain. – The French team used this area during their training camp in Slovenia in early July.

Two of the top runners lost time from 3 to 4 ; Both Casal Fernandez and Zsolt Lenkei lost 40 seconds – for Casal Fernandez this was one of the many places he lost the 40 seconds he was behind Thrane Ödum in the finish… Both seem to loose control at the middle of the leg.

Split times 3-4
1. 01:48 Sindre Jansson Haverstad (8.)
2. 01:49 Doug Tullie (5.)
3. 01:51 Tue Lassen (3.)
4. 01:58 Christian Christensen (17.)
5. 01:58 Luis Nogueira De La Muela (13.)
6. 01:58 Marius Thrane Odum (1.)
7. 02:01 Alasdair McLeod (6.)
24. 02:29 Zsolt Lenkei (4.)
28. 02:38 Roger Casal Fernandez (2.)


4-5, 5-6 and 6-7

We are in the tricky terrain, but the legs are short and there are no significant route choice options. The important thing here is to keep control of the orienteering, and to simplify properly in this very detailed terrain. Tue Lassen looses nearly 2:30 on the two first of these legs together – most to number 6. Doug Tullie looses nearly 1:30 to number 5. Thrane Ödum looses half a minute to number 7. The other top runners loose only a few seconds.

Split times 4-5
1. 01:11 Mate Baumholczer (14.)
2. 01:12 Mate Kerenyi (15.)
3. 01:19 Juan Manuel Merida Sanchis (40.)
4. 01:19 Luis Nogueira De La Muela (13.)
5. 01:19 Marius Thrane Odum (1.)
6. 01:20 Alasdair McLeod (6.)
7. 01:20 Roger Casal Fernandez (2.)
11. 01:23 Zsolt Lenkei (4.)
26. 01:31 Tue Lassen (3.)
47. 02:37 Doug Tullie (5.)

Split times 5-6
1. 00:53 Christian Christensen (17.)
2. 00:55 Bjarne Friedrichs (7.)
3. 00:57 Jegor Kostylev (16.)
4. 00:58 Anders Konring (36.)
5. 00:58 Marius Thrane Odum (1.)
7. 00:59 Zsolt Lenkei (4.)
9. 01:01 Roger Casal Fernandez (2.)
33. 01:29 Alasdair McLeod (6.)
44. 02:00 Doug Tullie (5.)
50. 03:00 Tue Lassen (3.)

Split times 6-7
1. 01:40 Evgeny Popov (19.)
2. 01:41 Tue Lassen (3.)
3. 01:42 Doug Tullie (5.)
4. 01:48 Luis Nogueira De La Muela (13.)
5. 01:48 Soren Schwartz (11.)
6. 01:52 Zsolt Lenkei (4.)
7. 01:53 Alasdair McLeod (6.)
12. 01:57 Roger Casal Fernandez (2.)
25. 02:08 Marius Thrane Odum (1.)

7-8

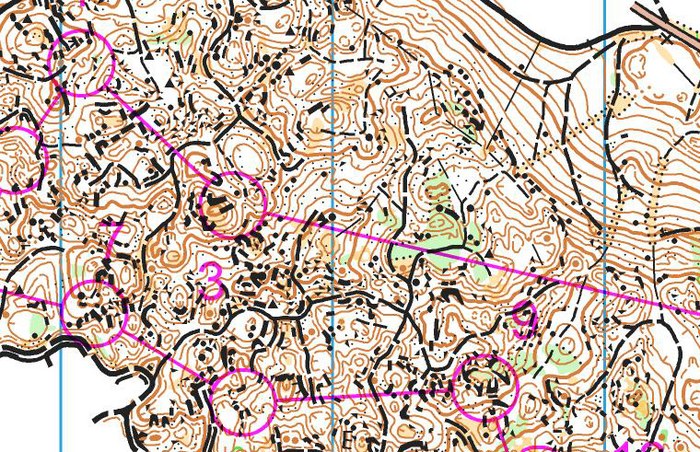
This is a short leg – but still with three different options. Either going left using the path, choosing a more right option attacking from the path crossing, or going direct. None of the runners with GPS-track are in the absolute top, but it seems that Casal Fernandez looses by going direct through the stones/cliffs. The left/right options lend themselves more to simplification and thus also faster running speed.

Split times 7-8
1. 02:05 Luis Nogueira De La Muela (13.)
2. 02:19 Tue Lassen (3.)
3. 02:22 Marius Thrane Odum (1.)
4. 02:24 Daniel Pelyhe (26.)
5. 02:24 Mate Kerenyi (15.)
6. 02:26 Doug Tullie (5.)
8. 02:27 Zsolt Lenkei (4.)
18. 02:38 Roger Casal Fernandez (2.)
36. 03:00 Alasdair McLeod (6.)


8-9

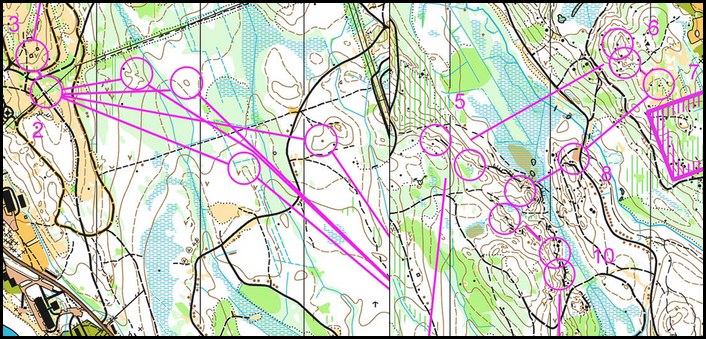
Another short leg with routechoice options – althoug for this one there are big differences in the different routes. Again the heart of the problem is how to simplify the leg in a way which make it possible to run without stopping to orienteer – and at the same time avoiding the places with bad runnability and the big holes.

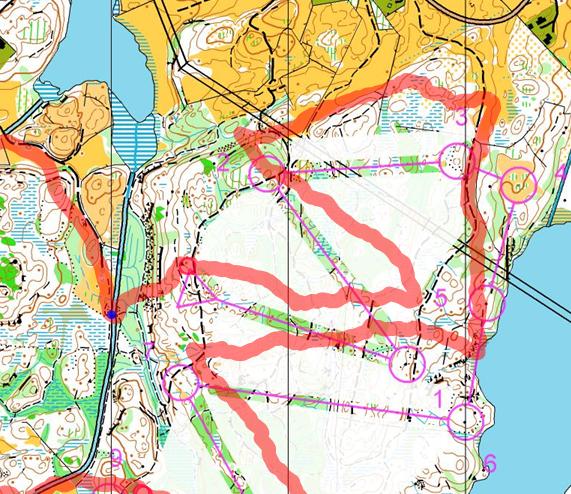
The left option – running on the path for most of the leg with a simple control taking – seems clearly to be the best option here althoug the runners for which I have GPS routes are some seconds behind the best split time. Casal Fernandez looses more than 40 seconds on this leg, going direct/right, not using the path system enough. Note however, that Bjarne Friedrichs also looses 20 seconds to Lenkei on this leg, even if he is close to the ideal route – loosing some time out of the control. The right option (run by Sören Lösch in the illustration below) might be better than it looks as Lösch did not run full speed in this competition.

Split times 8-9
1. 02:14 Evgeny Popov (19.)
2. 02:18 Doug Tullie (5.)
3. 02:21 Joost Talloen (49.)
4. 02:25 Tue Lassen (3.)
5. 02:28 Christian Christensen (17.)
6. 02:28 Marius Thrane Odum (1.)
7. 02:28 Zsolt Lenkei (4.)
25. 02:59 Roger Casal Fernandez (2.)
50. 05:43 Alasdair McLeod (6.)


9-10

The leg from 9 to 10 is another leg in this tricky, stony terrain with several route choice options. The question is how far around you can run on the path without loosing too much time. The answer: Very far!

- I did not plan to run this far around, Zsolt Lenkei said when going through the GPS animation just after the event. – When I noticed I was on the wrong path, I just continued.

This gave Lenkei the best split-time on this split. With 4:40 he was a few seconds faster than Rasmus Thrane Hansen. Comparing with the other runners with GPS-tracks, you see that the rightmost option is significantly faster than the other options. Furtheron, it is much easier to execute – giving a lot lower risk than the other options. I have no knowledge of where the other runners with good split times on this leg ran, but right would be my knowledge anyway due to the lower risk. Casal Fernandez looses 40 seconds to Lenkei on this leg due to taking the direct route with quite poor execution.

Split times 9-10
1. 04:40 Zsolt Lenkei (4.)
2. 04:42 Rasmus Thrane Hansen (10.)
3. 04:49 Doug Tullie (5.)
4. 04:49 Evgeny Popov (19.)
5. 04:51 Marius Thrane Odum (1.)
6. 04:51 Tue Lassen (3.)
7. 04:54 Alasdair McLeod (6.)
16. 05:20 Roger Casal Fernandez (2.)

10-11

Most manange this leg well – and all with GPS data take left. Tue Lassen however looses more than 2 minutes on this leg.

Split times 10-11
1. 02:03 Alasdair McLeod (6.)
2. 02:06 Roger Casal Fernandez (2.)
3. 02:09 Sindre Jansson Haverstad (8.)
4. 02:14 Martin Janata (9.)
5. 02:22 Zsolt Lenkei (4.)
9. 02:36 Marius Thrane Odum (1.)
16. 02:45 Doug Tullie (5.)
44. 04:24 Tue Lassen (3.)

11-12

The leg from 11 to 12 was another leg with routechoice options – and where several runners lost time. From the GPS data, left seems to be clearly the best choice here. You have a lot of path, and the control region is easy to simplify from the attackpoint. Lenkei looses 1:30 here – Casal Fernandez 20-30 seconds.

Split times 11-12
1. 02:13 Evgeny Popov (19.)
2. 02:19 Doug Tullie (5.)
3. 02:25 Marius Thrane Odum (1.)
4. 02:27 Bjarne Friedrichs (7.)
5. 02:33 Soren Schwartz (11.)
6. 02:42 Tue Lassen (3.)
7. 02:44 Roger Casal Fernandez (2.)
14. 02:59 Alasdair McLeod (6.)
35. 03:39 Zsolt Lenkei (4.)


12-13

The control number 13 is typically a control which it is possible to simplify considerably by taking a right curve into the control – using the flat area in front of the control you can keep high speed almost all the way to the control. If you go too far left, you quickly get into trouble. Lenkei looses more than a minute here.

Split times 12-13
1. 02:05 Luis Nogueira De La Muela (13.)
2. 02:19 Alasdair McLeod (6.)
3. 02:21 Evgeny Popov (19.)
4. 02:22 Juan Manuel Merida Sanchis (40.)
5. 02:22 Tue Lassen (3.)
6. 02:23 Doug Tullie (5.)
9. 02:28 Roger Casal Fernandez (2.)
10. 02:35 Marius Thrane Odum (1.)
28. 03:11 Zsolt Lenkei (4.)


13-14

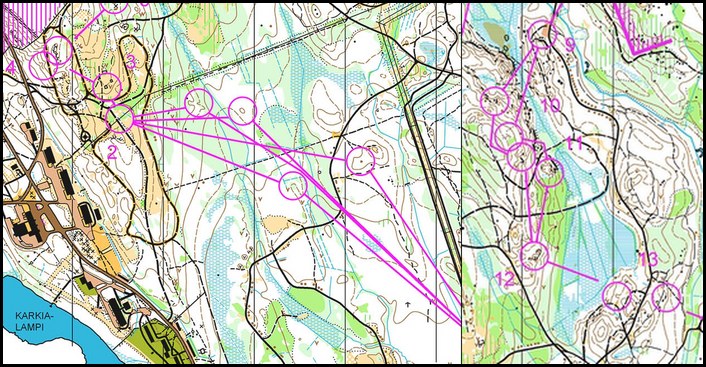
Control 13-14 is the most interesting routechoice leg of the day. Casal Fernandez took the optimal route choice and executed the route perfectly. That gave the best split time – more than 30 seconds ahead of Doug Tullie. Of the ones with GPS data, Lenkei takes the same route as Casal Fernandez, but looses 30 seconds at the start of the leg by not orienteering accurately out of the control – and 15 seconds into control 14. For most of the leg he has the same running speed as Casal Fernandez. Bjarne Friedrichs looses 2:20 by going all the way down towards the valley. Sindre Haverstad looses nearly two minutes by going up – taking too much height. The winner Marius Thrane Ödum looses 1:30 by taking a route which starts similar to Haverstad’s, but then coming down towards Casals route.

One of the main reasons for many runners taking a route similar to Haverstad’s route on this leg, is that it is difficult to read what is up and down here. Taking Haverstad’s route actually gives you 30-40 meters extra uphill, but you need to study the map carefully to see it. In addition, it requires more mapreading in the areas with many contours.

Split times 13-14
1. 05:34 Roger Casal Fernandez (2.)
2. 06:18 Doug Tullie (5.)
3. 06:19 Evgeny Popov (19.)
4. 06:29 Zsolt Lenkei (4.)
5. 06:38 Alasdair McLeod (6.)
7. 06:46 Tue Lassen (3.)
10. 07:04 Marius Thrane Odum (1.)

14-21

The control 14-21 are in the easier part of the terrain – time to run fast but not forget the orienteering. Casal Fernandez handles this best, and earns some seconds on the others.

Split times 14-15
1. 02:58 Luis Nogueira De La Muela (13.)
2. 03:03 Roger Casal Fernandez (2.)
3. 03:05 Tue Lassen (3.)
4. 03:07 Marius Thrane Odum (1.)
5. 03:09 Evgeny Popov (19.)
10. 03:16 Doug Tullie (5.)
11. 03:19 Zsolt Lenkei (4.)
12. 03:20 Alasdair McLeod (6.)

Split times 15-16
1. 01:12 Zsolt Lenkei (4.)
2. 01:13 Roger Casal Fernandez (2.)
3. 01:15 Alasdair McLeod (6.)
4. 01:15 Tue Lassen (3.)
5. 01:16 Doug Tullie (5.)
9. 01:19 Marius Thrane Odum (1.)

Split times 16-17
1. 01:18 Zsolt Lenkei (4.)
2. 01:20 Tue Lassen (3.)
3. 01:24 Alasdair McLeod (6.)
4. 01:24 Roger Casal Fernandez (2.)
5. 01:25 Mate Kerenyi (15.)
11. 01:32 Marius Thrane Odum (1.)
15. 01:38 Doug Tullie (5.)

Split times 17-18
1. 00:56 Alasdair McLeod (6.)
2. 00:56 Marius Thrane Odum (1.)
3. 00:57 Christian Christensen (17.)
4. 00:57 Tue Lassen (3.)
5. 00:58 Evgeny Popov (19.)
8. 00:59 Zsolt Lenkei (4.)
12. 01:00 Roger Casal Fernandez (2.)
19. 01:04 Doug Tullie (5.)

Split times 18-19
1. 00:42 Alasdair McLeod (6.)
2. 00:43 Christopher Smithard (44.)
3. 00:43 Luis Nogueira De La Muela (13.)
4. 00:44 Mate Kerenyi (15.)
5. 00:45 Mate Baumholczer (14.)
6. 00:45 Roger Casal Fernandez (2.)
7. 00:45 Tue Lassen (3.)
38. 01:01 Marius Thrane Odum (1.)
44. 01:11 Zsolt Lenkei (4.)
50. 01:38 Doug Tullie (5.)

Split times 19-20
1. 02:16 Roger Casal Fernandez (2.)
2. 02:18 Marius Thrane Odum (1.)
3. 02:23 Alasdair McLeod (6.)
4. 02:23 Tue Lassen (3.)
5. 02:27 David Schorah (21.)
6. 02:30 Doug Tullie (5.)
10. 02:34 Zsolt Lenkei (4.)

Split times 20-21
1. 01:10 Bjarne Friedrichs (7.)
2. 01:11 Marius Thrane Odum (1.)
3. 01:13 Zsolt Lenkei (4.)
4. 01:15 Jegor Kostylev (16.)
5. 01:16 Evgeny Popov (19.)
6. 01:16 Tue Lassen (3.)
7. 01:17 Doug Tullie (5.)
16. 01:27 Roger Casal Fernandez (2.)
28. 01:34 Alasdair McLeod (6.)

21-22

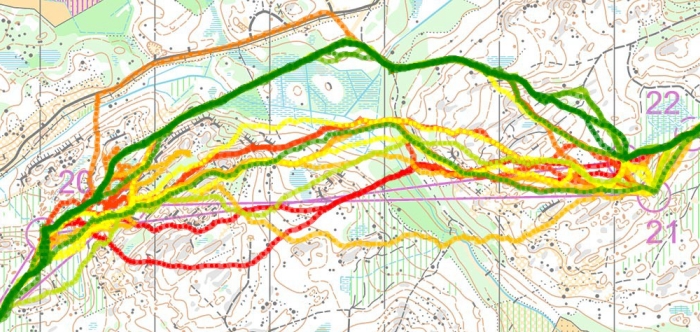
Another long leg, but very few routechoice options. Here it is just the question of being strong enough, and try to keep close to the line. Lenkei looses half a minute by going S-shape at the last part of the leg.

Split times 21-22
1. 06:54 Tue Lassen (3.)
2. 06:58 Sindre Jansson Haverstad (8.)
3. 06:59 Alasdair McLeod (6.)
4. 06:59 Luis Nogueira De La Muela (13.)
5. 07:00 Roger Casal Fernandez (2.)
11. 07:25 Marius Thrane Odum (1.)
14. 07:33 Zsolt Lenkei (4.)
20. 07:53 Doug Tullie (5.)

23-24

The leg from 23 to 24 was a leg where several runners lost time. At this stage in the race all the runners where tired, and only the toughest took the direct route with some extra meters of ascent. Marius Thrane Ödum is fastest by going direct. Casal Fernandez and Lenkei both go left and loose time – Casal Fernandez a whole minute. Direct is the fastest here.

- I used the end of the path [to the right] to control my descent towards the control, Thrane Ödum explained. – The last part into the control I used the stone group.

Split times 23-24
1. 04:10 Marius Thrane Odum (1.)
2. 04:13 Doug Tullie (5.)
3. 04:17 Evgeny Popov (19.)
4. 04:21 Soren Schwartz (11.)
5. 04:30 Jeppe Ruud (27.)
7. 04:33 Tue Lassen (3.)
11. 04:48 Zsolt Lenkei (4.)
13. 04:50 Alasdair McLeod (6.)
19. 05:10 Roger Casal Fernandez (2.)


24-25

The split from 24 to 25 is quite easy and short – but still Casal Fernandez takes it with a margin of more than 20 seconds by trusting his simplification of the terrain.

Split times 24-25
1. 01:41 Roger Casal Fernandez (2.)
2. 02:02 Sindre Jansson Haverstad (8.)
3. 02:03 Zsolt Lenkei (4.)
4. 02:07 Alasdair McLeod (6.)
5. 02:10 Evgeny Popov (19.)
6. 02:12 Doug Tullie (5.)
10. 02:23 Tue Lassen (3.)
12. 02:33 Marius Thrane Odum (1.)

25-26

Again a long leg with only one real option – the right one on the road. Several runners lost around half a minute here by not taking the path all the way to the control – one of them was Casal Fernandez.

Split times 25-26
1. 04:24 Marius Thrane Odum (1.)
2. 04:29 Tue Lassen (3.)
3. 04:31 Christian Christensen (17.)
4. 04:32 Bjarne Friedrichs (7.)
5. 04:32 Sindre Jansson Haverstad (8.)
7. 04:40 Zsolt Lenkei (4.)
10. 05:03 Roger Casal Fernandez (2.)
15. 05:08 Doug Tullie (5.)
19. 05:17 Alasdair McLeod (6.)

PS! If you want it even more tricky, check out the Ultimate Class (without paths/roads) – here is my map.
Interesting study: Evaluation of tools for o-technical analysis

Posted by Jan Kocbach, 18 Jul 2011@8:00

analyse
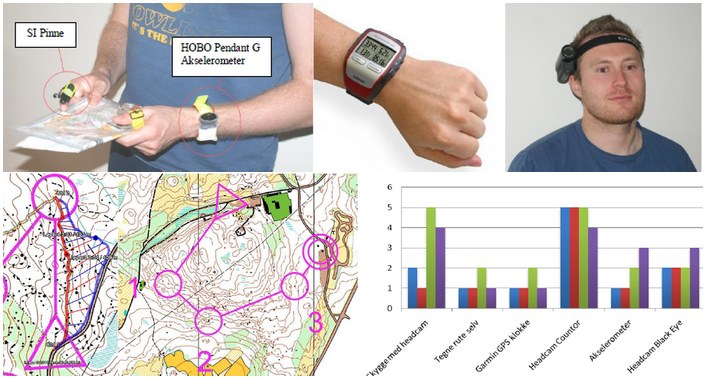
- Which feedback can you get from different tools for o-technical analysis, and how useful are they for trainers and runners? This was the question asked in a scientific study performed by Hans Jørgen Kvåle and Kim André Sveen in a study they did as part of the course “Pedagogics with Sport focus” at the Dalarne high school this spring. Hans Jørgen Kvåle is one of the best Norwegian ski-orienteers.

The study is quite extensive – resulting in a 77-page report – including all the background material. Unfortunately for international readers the report is in Norwegian language. If you understand Norwegian, it is well worth a read, though.

Evaluation methods

The study looks at several different evaluation methods,

  • Split time analysis
  • Drawing your own route on the map after the training/competition
  • Analyzing GPS-track
  • Headcam-video worn by the runner (analyzed along with GPS-track)
  • Headcam-video by somebody running behind the runner (analyzed along with GPS-track)
  • Mapreading analysis with automatic mapreading device (accelerometer) – also called AMRD

The report concludes that the use of headcam-video synchronized with GPS-track was the most useful for o-technical analysis. 3DRerun was used for the headcam-synchronization in the study. The report also concluded that it is important to always draw your route after the training/competition as the first part of the analysis. The automatic mapreading detection is evaluated as very promising, but there were some problems with accuracy of the method in the study (this might be due to how the equipment was used).

You find the report in the “Overview articles” section of o-training.net – along with among other Thierry Gueorgiou’s “Full speed – no mistake”, Martin Lerjen’s “Analyzing your mapreading” and Ultimate Orienteering’s report from the International Coach Conference 2009:

Note! The author of this article (Jan Kocbach) contributed to the study as a representative for the Norwegian Orienteering Federation by reading the report and giving comments and tips on the procedure used.

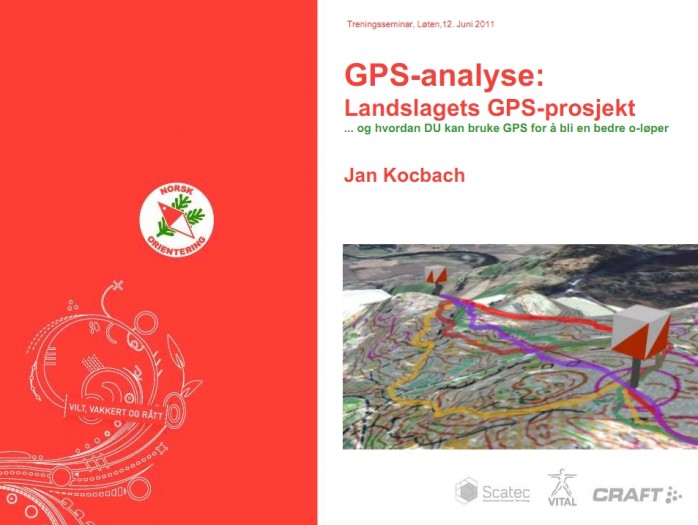
GPS Analysis HowTo Presentation (Norwegian text)

Posted by Jan Kocbach, 27 Jun 2011@22:00

gpsanalyse

This Norwegian text HowTo-presentation about GPS-analysis might be interesting for some of the readers of o-training.net. The presentation was held June 12th at a Training seminar in Løten, Norway with 80-100 attendees.

In addition there was also a very interesting presentation by Kenneth Buch about “the athlete conversation” – how he speaks to and guides his athletes.

For both cases the slides only tell part of the story, but it might still be instructive to take a look at them.

Jukola and Venla 2011 decisions: Meter by meter

Posted by Jan Kocbach, 23 Jun 2011@5:00

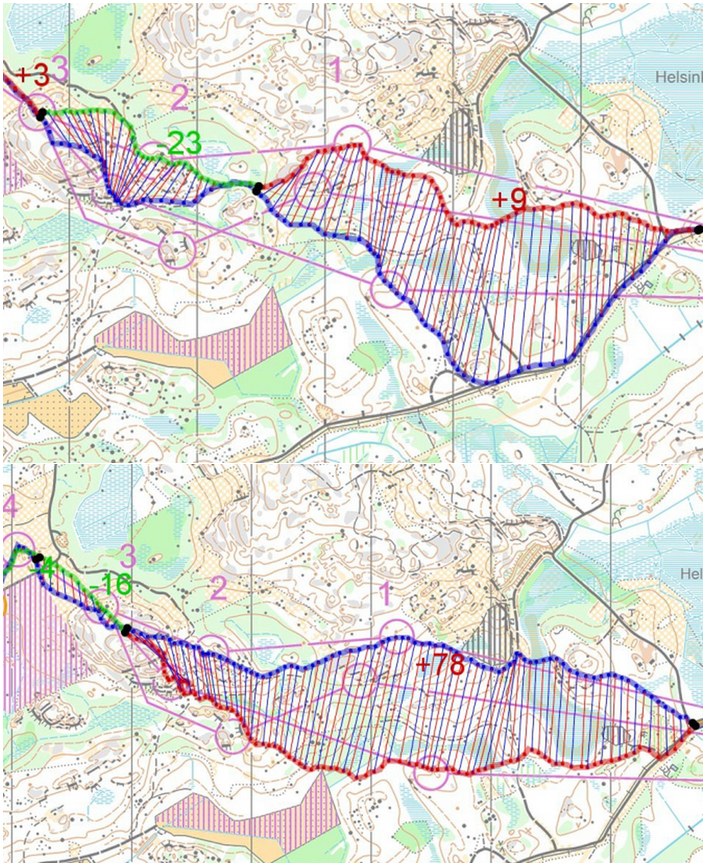
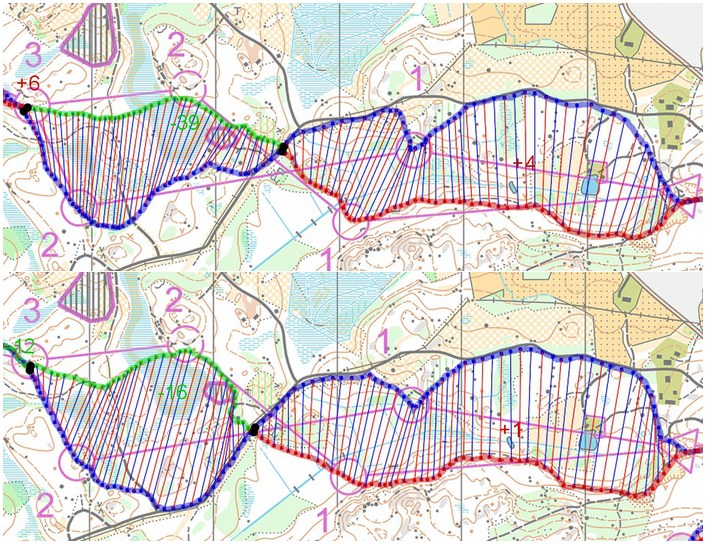
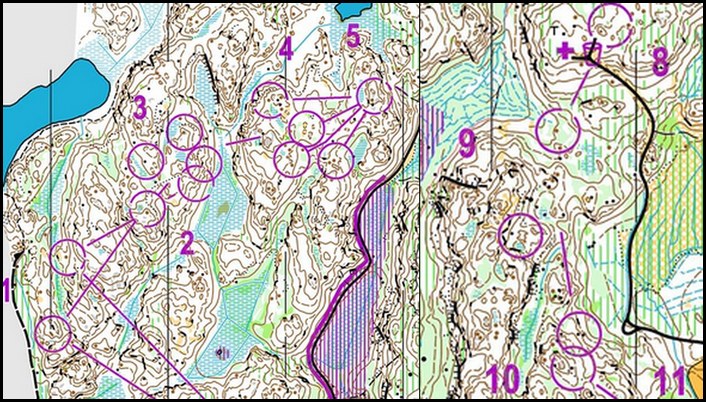
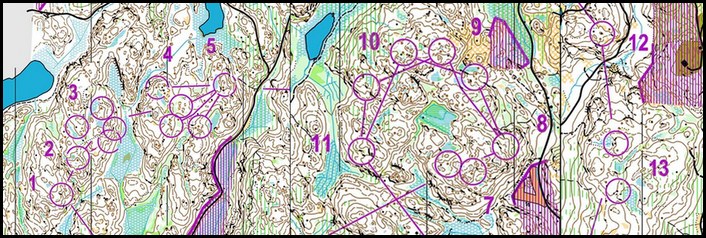
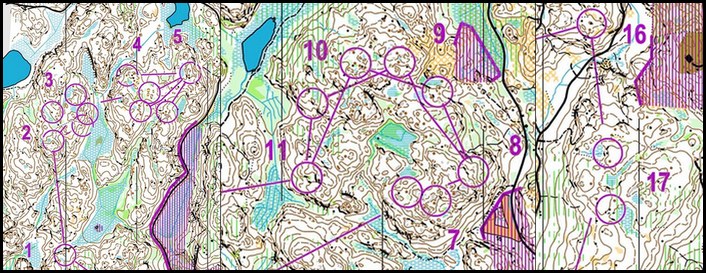
Comparison of the two top teams in the Jukola and Venla relays – meter by meter. Study how the runners on the winning team performed and how the forkings worked using very illustrating autOanalysis figures. This autOanalysis functionality is planned to be included in 3DRerun eventually, to make it possible for YOU to make similar illustrations for your own competitions and trainings.

I won’t include a full analysis of the Jukola and Venla relays here, but just point at some interesting information you can find from these kind of illustrations. Similar illustrations from all legs in both Jukola and Venla are included below for you to enjoy.

Jukola countdown -2 days: Learn about Jukola forking

Posted by Jan Kocbach, 16 Jun 2011@5:00

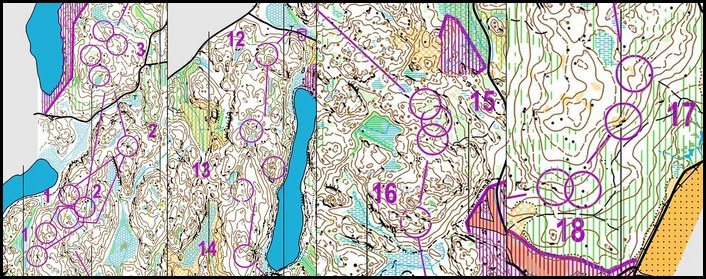
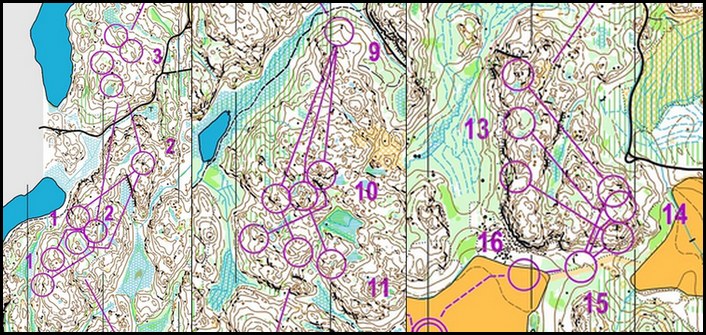
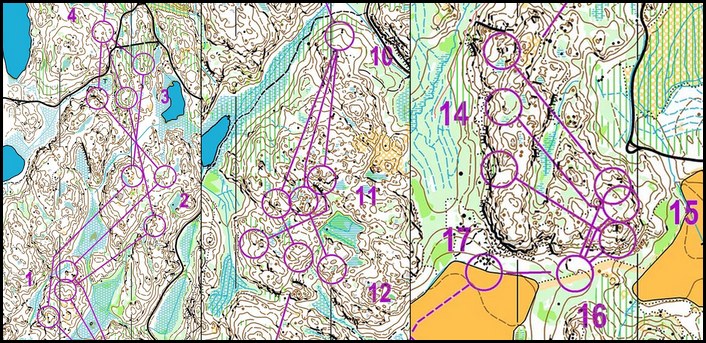
See all forked controls for Jukola 2010, 2009, 2008, 2007 and 2006 – and Venla 2010 and 2009 – in one page – and try to understand what will meet you on the Jukola relay on Saturday. If you were searching for an easy answer, I got to disappoint you.
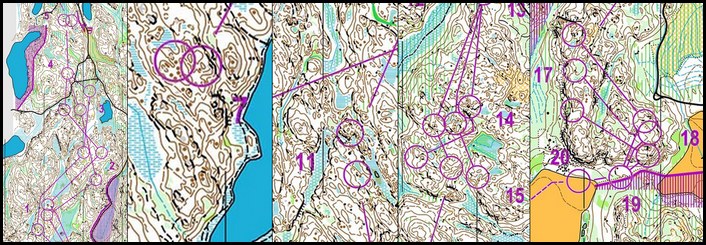
It is good preparation for Jukola to take a look at the forking schemes for the last editions of the relay

The answer on the above question: It is totally unpredictable. Forking varies a lot from year to year in the Jukola relay. The year of 2008 was a year with a lot of forking – most controls on the first leg where forked in 2008. In 2009 there was a lot less forking – and 2010 was also far from the standard set in 2008. It may seem like the amount of forking in Jukola has been going down the last year. However, as stated above it is totally unpredictable, so you won’t know until you have the map in your hand on Saturday or early Sunday morning.
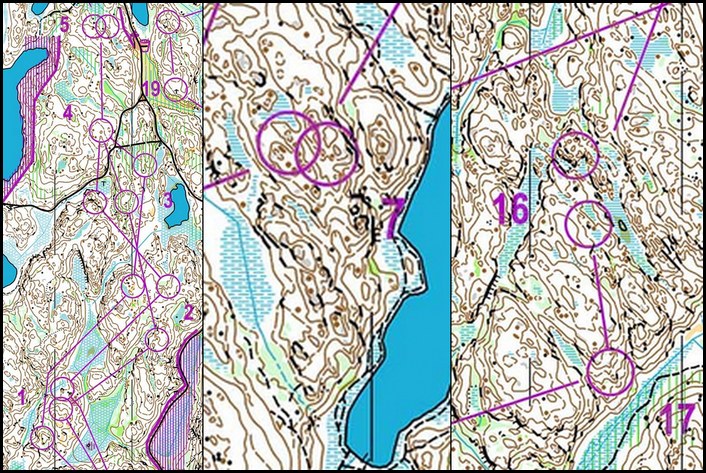
Good preparation for Jukola

On the other hand, it is good preparation for Jukola to take a look at the forking schemes for the last editions of the relay. As you can see, there are a lot of different types of forkings used. The main types of forkings can be categorized into three types:
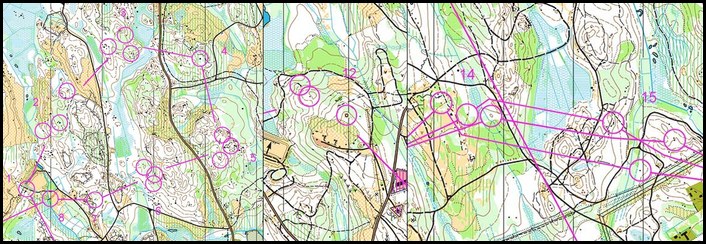
  • Type 1: One single forked control, for example
    • Start – 1 – A – 3 versus
    • Start – 1- B – 3
    • … and up to four variants
  • Type 2: A forked leg, for example
    • Start – 1 – A1 – A2 – 4 versus
    • Start – 1 – B1 – B2 – 4
    • … and up to four variants
  • Type 3: A group of two forked legs, for example
    • Start – 1 – A1 – A2 – A3 – 4 versus
    • Start – 1 – B1 – B2 – B3 – 4
    • … and up to four variants

The ones defined as type 3 are the most complex ones, and especially if the legs are long and the variants are crossing each other these may lead to significant mistakes and confusion for the runners. The ones defined as type 1 are the ones giving the least spreading, but they may still be tricky. It looks like we have been getting more of type 1 and type 2 forkings and less of type 3 forkings the last years.

Enjoy the forkings of the last editions of Jukola below!

Jukola 2010 – Leg 1 & 2

2011_01

Jukola 2010 – Leg 3

2011_03

Jukola 2010 – Leg 4

2011_04

Jukola 2010 – Leg 5

2011_05

Jukola 2010 – Leg 6

2011_06

Jukola 2010 – Leg 7

2011_07

Jukola 2009 – Leg 1

2009_01

Jukola 2009 – Leg 2

2009_02

Jukola 2009 – Leg 3

2009_03

Jukola 2009 – Leg 4 & 5

2009_04_05

Jukola 2009 – Leg 6

2009_06

Jukola 2009 – Leg 7

2009_07

Jukola 2008 – Leg 1

2008_01

Jukola 2008 – Leg 2

2008_02

Jukola 2008 – Leg 3

2008_03

Jukola 2008 – Leg 4 & 5

2008_04_05

Jukola 2008 – Leg 6

2008_06

Jukola 2008 – Leg 7

2008_07

Jukola 2007 – Leg 1 & 2

2007_01_02

Jukola 2007 – Leg 3

2007_03

Jukola 2007 – Leg 4 & 5

2007_04_05

Jukola 2007 – Leg 6

2007_06

Jukola 2007 – Leg 7

2007_07

Jukola 2006 – Leg 1, 2 & 3

Note! Some forking controls missing here for the 2006 case.
2006_01_02_03

Jukola 2006 – Leg 4 & 5

Note! Some forking controls missing here for the 2006 case.
2006_04_05

Jukola 2006 – Leg 6 & 7

Note! Some forking controls missing here for the 2006 case.
2006_06_07

Venla 2010 – Leg 1 & 2

v2011_01

Venla 2010 – Leg 3

v2011_03

Venla 2010 – Leg 4

v2011_04

Venla 2009 – Leg 1 & 2

v2009_01

Venla 2009 – Leg 3

v2009_03

Venla 2009 – Leg 4

v2009_04

Jukola countdown -9 days: 3DRerun for pre-race analysis

Posted by Jan Kocbach, 09 Jun 2011@8:00

juk2011
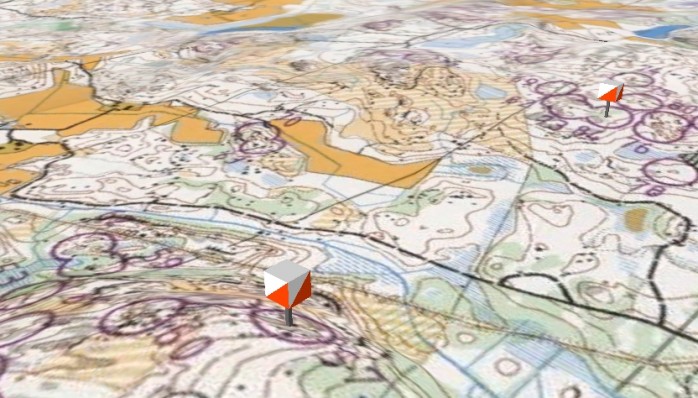
3DRerun is mostly a tool for analysis after races, but it does also have some interesting functionality which can be useful for pre-race preparation. One of these functions is “Measure lines”, where you can draw imaginary routes on an old map of the competition area, and compare route lengths and running times for the routes. The other is to replay competitions and trainings of competitions close to the race area.

The screencast below shows you how to do pre-race preparation in 3DRerun – it does not give you the actual preparation though. If you’ll rather help yourself, you can go directly to 3DRerun for the maps which are discussed in the screencast:

To get full insight into how to use 3DRerun for pre-race analysis, my tips is to take a look at the 10 minute screencast below though. It won’t give you any specific info for Jukola 2011, but it will help you to use 3DRerun more effectively.

Jukola countdown -12 days: HeadCam video with map

Posted by Jan Kocbach, 06 Jun 2011@8:00

This HeadCam video with accompanying map from the neighbor terrain of Jukola 2011 is a nice way to prepare for Jukola 2011. The Häppilä map featured in this video is one of the Jukola 2011 training maps. The video is from a national race in this terrain in early May this year.

Sit back and enjoy – the video is 37 minutes long… By comparing map and video you can understand how the map and the terrain compares – and get prepared for the challenges you will meet at Jukola 2011.

The video is made by Jarkko “Mr. Routegadget” Ryyppö. This is probably one of the most advanced HeadCam videos from orienteering events made yet. Follow the Routegadget page on Facebook to get updates from Jarkko.

Here is another HeadCam video from the same terrain – but without map. This is from May 29th – so the vegetation is closer to what you can expect at Jukola 2011:

Häppilä, training 29.5.2011 from Jarkko Ryyppö on Vimeo.

Jukola 2011 webpage

Using Performance Index for race analysis (screencast)

Posted by Jan Kocbach, 01 Jun 2011@8:00

perfindex
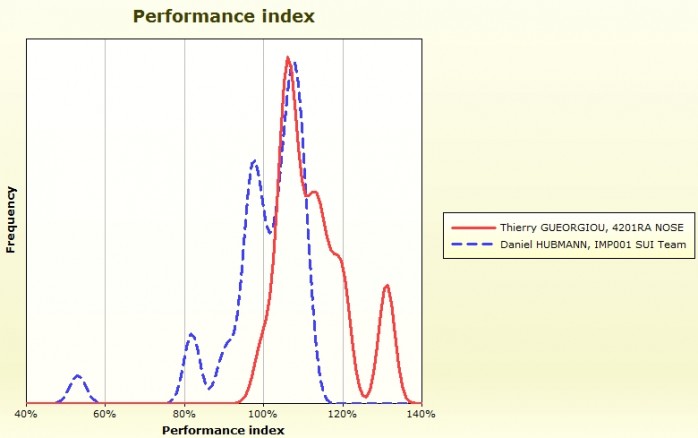
This video compares the performance of Hubmann, Gueorgiou, Rollier and the other top runners in Sunday’s event on Le Revard by analyzing the Performance Index in WinSplits Pro. In this era of GPS analysis, many forget the value of analyzing the split times. There is however a lot of useful information hidden in the splits.

The motivation behind this screencast is to show how the Performance Index can give you insight into the potential of different runners based on their current abilities – both running speed and o-technical abilities. This can be useful to assess the potential of yourself or somebody you coach if you are a trainer. The analysis is done in the program Winsplits Pro (which comes at a price of around 60 Euro) – a very useful tool by Mats Troeng – the man behind QuickRoute. I am no expert on either WinSplits Pro or the Performance index – if I missed something important, please add a comment below to let me know.

PS! Screencasts is new to me – and I consider this as a test. Is this something which I should continue making at o-training.net for other topics as well? Does the format work? Too slow and boring? Warning: If you are not above average interested in orienteering analysis, this is probably nothing for you! No fancy moving stuff to keep your attention.

GPS Analysis for Orienteering: All the Basics!

Posted by Jan Kocbach, 13 Apr 2011@5:00

gpsanalysis_s
Step-by-step instructions for effective use of QuickRoute for analysis of trainings and competitions: GPS analysis has been a revolution for analysis of technique in orienteering. This article considers the basics for analysis of orienteering races or trainings: Software, Equipment, Step-by-step instructions for getting your route on the map, and tips regarding o-technical analysis. This article considers a single GPS track from a single runner – a later article will consider analysis of more than one GPS track/runner (which gives you a lot more input).

With the tools and equipment available today, GPS analysis of orienteering activities is quite simple – and a lot of orienteers do GPS analysis of their races and competitions. Still, based on all the requests I get about the topic, it looks like a simple set of step-by-step instructions along with equipment tips would be welcomed. This article takes you through the basics – it will be updated based on comments and questions.

Note! This article starts on a very basic level, to appeal to orienteers who have never tried GPS analysis yet. If you are already familiar with getting your route into QuickRoute, you may jump directly to the analysis section. You should nevertheless take a look at what is written about route adjustment, as that is an area where many don’t pay enough attention.

Equipment and software

- The best option for analysis of a single GPS track is definitely QuickRoute

For equipment there are a lot of options which all will give you excellent data for analysis. I have listed many options in the “Equipment” section below – my personal preference is one of the Garmin GPS watches (with pulse if possible, as this adds further to the analysis – the best option has a possibility to record every second). In the step-by-step instructions I will assume that you either have a Garmin GPS watch or that your GPS comes with software which allows you to export a GPX-file (GPX is a standard file format for GPS data).

For software, the best option for analysis of a single GPS track is definitely QuickRoute, in my opinion (you may also combine it with 3DRerun – see more info in the software overview below). Thus the step-by-step instructions below are based on using QuickRoute for the analysis. Note that you need a Windows PC to use Quickroute. Several other software options are listed in the software section at the bottom of this article.

Step-by-step instructions: Getting your Route on the Map

These step-by-step instructions take you through all you need to get started with GPS analysis of an orienteering activity.

  • Step 1: Record your GPS track on the orienteering course. For a Forerunner GPS watch, all you need is to start the stopwatch in order to start the GPS track – and stop the stopwatch in order to finish it. The GPS track will then be stored in the watch, ready to transfer to the computer when you get back home.  Tip: The GPS watch should lie on the ground – turned on in GPS mode – for at least 5 minutes ahead of your activity in order to get a good GPS fix. This will increase accuracy significantly. For the Forerunner 405/310XT it is best to start the stopwatch before you lie the watch on the ground to make sure you get a good GPS fix. If you use another GPS unit than a Forerunner watch, refer to the instruction manual regarding how to record a GPS track (you should still put it on the ground for 5 minutes, though).
  • Step 2: Download QuickRoute from here, and install the software (requires Windows). Tip: The development version has some new features, and might run more stable on some computers.
  • - Always scan the map with North up – or at least rotate before you load it in QuickRoute

  • Step 3: Scan your orienteering map from the competition, or even better get a jpg/gif export from OCAD of the course for maximum accuracy. You may also take a photo of the map, but this gives poorer accuracy. Tip: (1) Always scan the map with North up – or at least rotate before you load it in QuickRoute – a rotated map may in many cases make adjustment of route more difficult. (2) It is often advantageous to reduce the size of the map file to around 1-1.5 Mb for QuickRoute to work faster – you usually don’t need more than around 200 dpi for your analysis.
  • Step 4: Connect the GPS unit to the computer after installing the required drivers. If you have a Forerunner 405/410/310 XT/610/910XT, you don’t even need to connect the GPS to the computer – all you have to do is to insert the ANT USB key, and the GPS data is transferred automatically. It you have a Forerunner 305/205, you must connect your GPS to the computer, but you don’t need to transfer anything (that is done in QuickRoute). For other GPS units, you need to transfer the GPS route to the computer according to the manual for the GPS unit, and then export to a GPX-file or other compatible QuickRoute format.
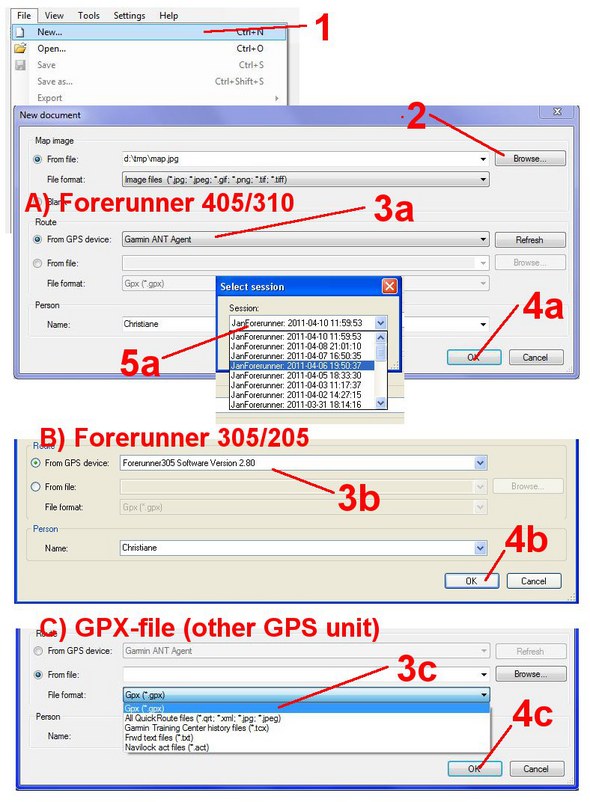
  • Step 5: Start QuickRoute, and open the menu entry “File -> New” in order to start a new activity (see 1 in illustration below). Then locate your scanned map file on the disk (2 in the illustration). Depending on which GPS unit / watch you have used, there are now three different options (but all are easy). For a Garmin Forerunner 405/410/310 XT/610/910XT or other unit which uses the Garmin ANT agent, choose “Garmin ANT Agent” under “From GPS device” (3A in illustration), click OK (4A) and find the activity on the watch (5A).  For a Garmin Forerunner 205/305, choose “Forerunner 305″ in From GPS device” (3B in illustration), and click OK (4B), and then find the activity you want to analyze. For other GPS units, choose “From file:” and under “File Format” choose “GPX-file” (3C) – and locate the GPX-file on disk using the “Browse” button, and then click OK (4C).quickroute_instructions_a_s
  • Step 5: Opening the map with route. Now you should get up the map and the route – but the two don’t fit very well. Below is an example of what you could see after opening map and route. We will now adjust the route to the map.adj1
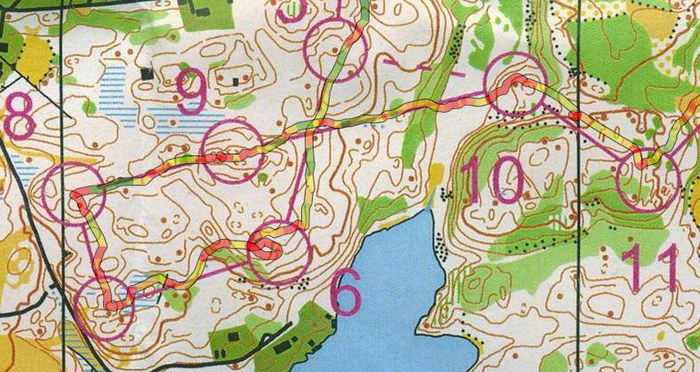
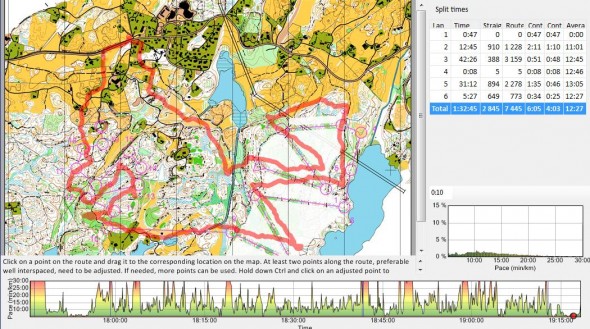
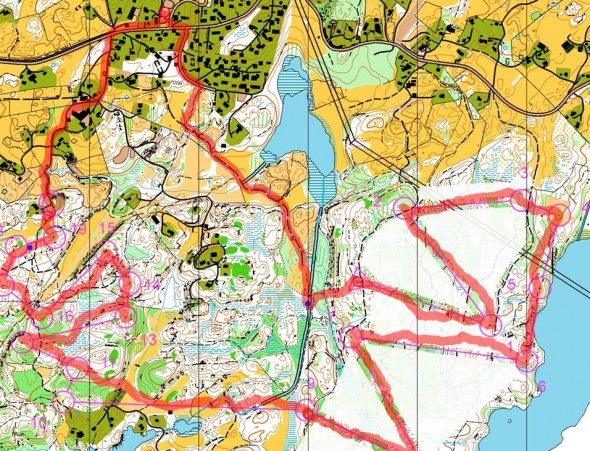
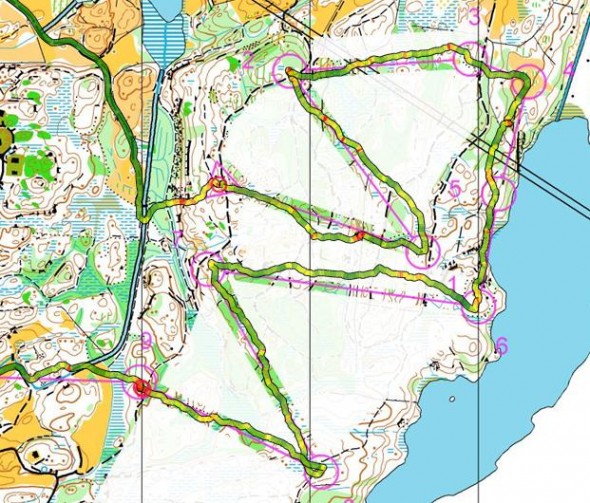
  • Step 6: Adjusting the route to the map. This is the crucial step – in which many don’t pay enough attention.  Remember that if your GPS track has good quality, and the map is fairly good, you should be able to get a quite good fix by adjusting only two(!) points. Thus try to get optimal results with adjustment of only two points before proceeding to analyse with more points. Point adjustment is done by clicking the mouse on a point on the route, and dragging this point to the correct point on the map (you will note that all of the route moves when you do this for the first point.(1) Find one point at the route where you are 100% sure that you were, for example a bend on a road/track or similar. In the example below the bend of a path is chosen (blue point). Tip: Use the “+” and “-” symbols on the toolbar to zoom in and out on the map to make adjustment easier. Note that when you use the “+” and “-” symbols, QuickRoute thinks that you have finished adjusting your map, and you have to go back in adjustment modus (click the adjustment mode symbol on the toolbar adjustmentmode )

    adjp1(2) Take a second point – preferable as far away from the first point as possible, and move this point until all of the route fits as well as possible (thus, don’t pay attention to point 2 only, but all of the route). Now you usually should get a quite good fit. See the current example below – adjusted with two points. Tips: (1) If it didn’t work well the first time, you can move the first point and try again (maybe you didn’t hit well with the first point – this was the case for my current example). (2) This may give non-optimal results if one of the points is at the start of your track, and you had a bad GPS fix at the start of your exercise. Try again with points later in the exercise in this case. (3) You can unselect one of your chosen points by clicking “shift” + the left mouse button – and choose two other points instead to see if this gives better results. (4) If you use split times on a Forerunner watch at the control points, these will show up in QuickRoute as red circles. These may make adjustment easier – but remember to still start with only two points to get optimal adjustment also between the control points due to algorithms used.
    adjp2

    (3)  If necessary, you may adjust more points to get good adjustment in certain parts of the course where you have problems, but be patient and try to get a good adjustment with only two points. This gives you better overall correspondence between map and GPS data. Furthermore, if you want to use 3DRerun for analysis (see further down for more info on this), you will consistently get bad results in 3DRerun if you use more than 2 calibration points in QuickRoute.

  • Step 7: Now your route and map is calibrated, and you are ready for analysis. Click the analysis mode symbol on the toolbar in order to go into analysis mode analysismode. You will now see your course with the track overlaid in different colors (see example below for part of the current course).analysismode2
    The standard analysis mode when QuickRoute starts is to show a color along your route according to your pace (in min/km) – where green is fast and red is slow.  Before you proceed with further analysis, you should adjust the pace settings in order to get colors on the track which give you the information you need (having a totally green track doesn’t tell you much, the same with total red – you should be able to identify the spots where you slow down / loose time and speed up), and also adjust track width, transparency and so on.  Pace is adjusted by changing the numbers marked with (2) and (4) in the illustration below (given as 5:08 and 14:07 in the example). Transparency is adjusted using (7), and line width and border thickness with (8) and (9), respectively. Optimal values depend on the map resolution and what kind of analysis you are performing. Note also that you can change from Pace analysis to Hear rate analysis or Direction deviation analysis using the menu marked with (1) in the illustration below (will be needed later on in the analysis).modes2

Now everything is ready for analysis. Analysis of orienteering activities in QuickRoute is covered below.

Typical orienteering analysis session

Before going into the analysis techniques in QuickRoute in detail, I will just repeat  a typical analysis session as described in the article about analysis of HeadCam videos – as a systematical approach is very important in order to really improve. Also, it is important to note that what you should optimize is YOUR optimal orienteering technique – which is a balance between your current orienteering technique and running speed. How fast can you run while still orienteering well enough to not make mistakes?

- Identify how to act in the future to avoid this type of time loss

A typical analysis session goes as follows

  1. Identify mistakes/time-losses by split times and/or GPS data.
  2. Identify the reasons for the time loss using a combination of GPS track, split times and other information available about the situation.
  3. After finding the reason for the time losses, identify how to act in the future to avoid this type of time loss. This should be defined in form of one or more tasks which can be trained on in a targeted way in future trainings/competitions – and then evaluated using a similar analysis in the future. This last step is actually the most important step in the analysis – don’t stop at step 2!!

In addition to finding time losses, you should also focus in similar manner on the parts of the route where you performed well. What was the reason for performing well – what should you do to repeat your good performance in the future.

Analysis of orienteering activities using QuickRoute

- Remember to write down your analysis to make sure you can learn from it

There are a lot of possibilities for analysis in QuickRoute. Not all of them will be covered in full detail in this article, but pointers will be given towards many of the options you have. Note that a basic split time analysis is very useful along with the GPS analysis – it is even better to be able to compare your GPS track with other GPS tracks (which is possible in e.g. 3DRerun, RunoWay, GPSseuranta, MapandCoach or Routegadget) which will be covered in a later article.

The reason for doing the analysis below is to be able to understand and identify the reason for all time losses. When you have understood the reason for the time losses, you can work on improving your orienteering technique to avoid these time losses in the future. Remember to write down your analysis to make sure you can learn from it!

A typical problem with orienteering analysis is that it is not easily measurable. For a track and field 800 meter runners it is easy to see when the training works (the time on the 800 meter goes down) – for an orienteer it is not that easy to see when o-technical training works. By doing proper GPS analysis of trainings and competitions – analyzing how the size and distribution of mistake varies with time, and also using the suggested measurables given below e.g. for time in/out of the control for control taking training and direction deviation for compass training, you can much better evaluate your training.

Tip: Use “split times”
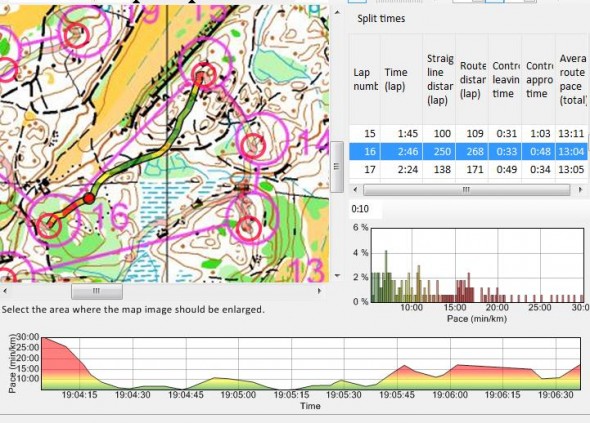
Use “split times” along with the “split times table” in the right pane of QuickRoute in order to get more out of your analysis (see illustration below). You can either use your original split times from a Garmin watch, or make your own split times at arbitrary places along the course – wherever you need them for your analysis. Instructions:

  • Click the add split time symbol in the toolbar ( addsplit), and then click anywhere on your route to add a split (red circle) at this positions (use the shift key and the mouse button to remove a split point). You typically insert splits at control point locations, but based on which analysis you want to do (as discussed below), it may also be at other spots. If you have takes split times on your Garmin watch, they will automatically be set in QuickRoute.
  • You now get a table in the right pane of QuickRoute with information about each leg. You can choose which custom columns to show in the table by right clicking the table and choosing “select columns”. Lap time, average pace, time in/out of control circle, average heart rate and direction deviation are some examples of fields you can get in the split times table.
  • You can now click each leg in the table in order to highlight the leg in question, as seen in the example below for leg number 16. In the table you then get key parameters about your performance. This may be very helpful in your analysis.

splitanalysis

Now over to how to perform the analysis:

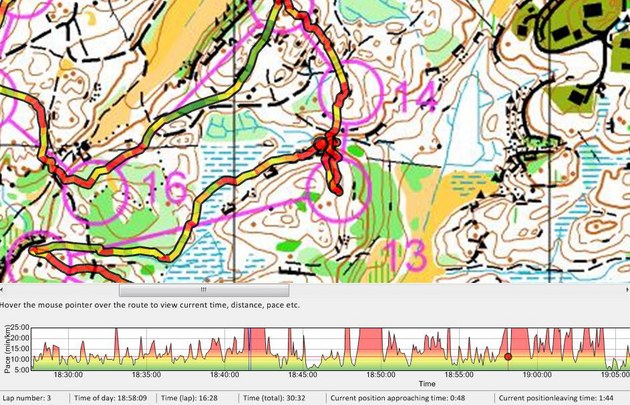
  • Analysis of time loss for direct control mistakes. Identify a mistake on the course either by looking at the GPS track or by comparing split times from the event with others. Below one (small) mistake from the example at the 13th control has been identified. To find out how much time you lost for your specific mistake/time loss, you can move the mouse pointer along the route – you should now see a red circle moving along with the mouse pointer. If you look at the bottom of the screen, you see an equal red ball dancing along a curve showing your pace as a function of time along the course. Below this curve, you see “Time (lap):” and your lap time. By moving the mouse pointer along your GPS track and noting the time at different points along the track, you can thus easily identify how much time you use (and loose) on a specific part of the track. (alternatively you can add split times at the start/end of the mistake using the add split time symbol as described above).
    mistakes7_s

    This is a good method to understand exactly how much time you loose on direct mistakes – and a typical first step in an analysis session. After understanding how much time you lost, you need to understand why you did this mistake – and how to avoid this type of mistakes in the future. The GPS track along with your memory of the situation can often give you the answers you need (a headcam might give you even more information). Was the mistake based on a direction mistake? Did you run with too high speed / too little control towards the control? Did you forget to make a proper plan on the leg? Did you forget to have a proper secure attackpoint for the control? Did you use the most appropriate details in your orienteering? Did you simplify the leg enough? And so on.

  • - Make split times for different types of terrain in order to analyze your capabilities

  • Analysis of pace in different terrain types/characteristics. Using the GPS data, you can understand how your running speed varies in different terrain types / uphill / downhill, and use this to learn what is the best route choice for you.  The best way to perform this type of analysis, is to make “split times” for different types of terrain in order to analyze your capabilities, and make a “split time table” showing your pace in min/km for different terrain types. By making a similar table for different runners (you can do this in your club for a specific training), you can also find how your relative pace in different terrain types varies compared to other runners – and find your strengths and weaknesses. Knowing your strengths and weaknesses, you can use this in your strategy – and also use it in order to see where you need to improve.
  • Analysis of time loss for bad route choices. This one is a bit more tricky using only a single GPS track, but you should be able to identify some of the time losses by analysing the GPS track with pace data overlayed.
  • - One type of pace increases to look for is stops to read the map

  • Identifying smaller time losses using pace curve. The pace curve seen at the bottom of the screen is a very good tool to identify smaller time losses. You should go through regions where the pace is higher (red on the curve), and understand the reason for the pace being higher – especially in areas where you loose time based on your split time analysis. In many cases the pace is high due to uphills, bad runnability etc., but there is often some information to gain from identification of pace variations (there is a lot more to gain when comparing with other GPS tracks on the same course, though). One type of pace increases to look for is stops to read the map. Another type of pace increase is due to running through areas with poorer runnability. See also “identify time lost due to uncertainty” below.
  • Identify time lost due to uncertainty. Many time losses can be traced back to uncertainty, i.e. keeping a lower speed due to not having the situation under control, and thus (1) reading the map more often/retrospectively and (2) generally keeping a lower speed. Try to identify these time losses using the GPS data. You can train targeted on avoiding time lost due to uncertainty by reading the map more in advance, simplification, etc.
  • - GPS analysis is a good tool in order to analyse your control work

  • Analysis of time in and out of control. GPS analysis is a good tool in order to analyse your control work, i.e. the time you use in and out of the control.  In the “split time table” in the right pane you can set up a column to be the time into the control and another column to be the time out of the control (the size of the control circle can be chosen in the settings, default is 45 meters.  You now get a number which tells you how good you perform in the control area – a very important area in orienteering. You can now work targeted in competitions/trainings on improving this number (be a bit careful with evaluation though, as the time in/out of control varies with terrain, elevation etc.).
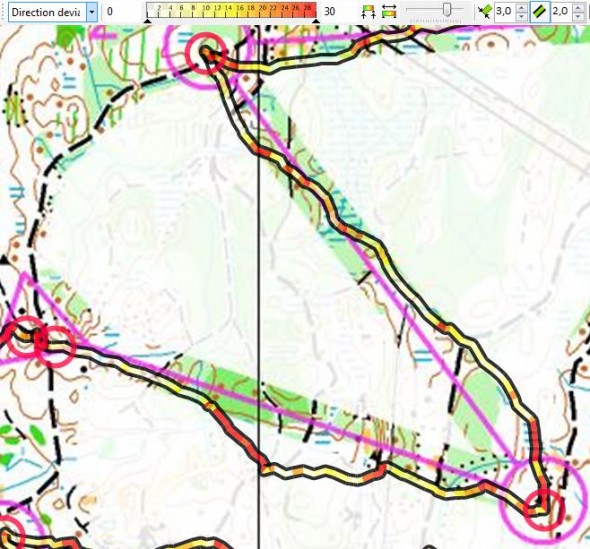
  • Identifying  time losses based on direction running efficiency. One way to identify smaller time losses is to see if your curve is straight in areas where you should run in a straight line/compass course – i.e. look at your direction deviation. If your route has many small S-curves here, you need to work on your straight running / compass running. You can evaluate direction deviation directly in QuickRoute by adding split times for controls using the add split time symbol in the toolbar, and choosing “Direction deviation” instead of pace to color the GPS track (see sample below). If you set e.g. 30 degrees direction deviation to be colored red as in the illustration below, you can easily identify the spots where your direction running between two controls was not good (see e.g. red areas in the example below on the way to the first control. You can also get the average direction deviation on each leg in the “split time table”. Thus you again get a number which tells you how good you perform in your training/competition,  which you can work targeted on improving.direction
  • - Did you push too hard giving you too high heart rate ahead of a mistake?

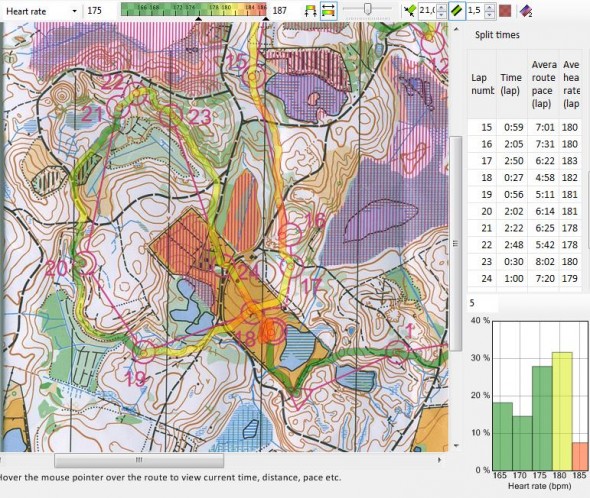
  • Heart rate analysis. If you have used a Garmin watch with heart rate information (some other watches also give you heart rate information along with your GPS track), you can analyse how your heart rate varied during the competition/training, and thus how your heart rate influenced on your o-technical performance.  You typically start this type of analysis by choosing “Heart rate” instead of pace to color the GPS track (see sample below). Now you can see how your heart rate varies during the race the same way as you did for the pace. Did you push too hard giving you too high heart rate ahead of a mistake? Did you open too hard and therefore not manage to keep up the heart rate during all of the race? Here is an example  where the GPS track is colored with heart rate:avheartrate2
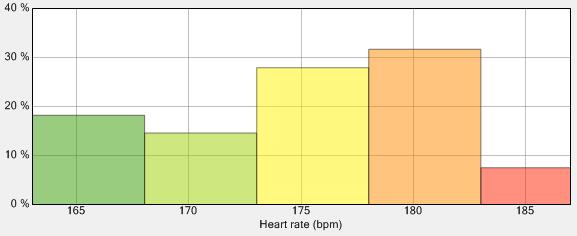
    In the “split table” we have now set up the average heart rate for each split. You can also get a histogram to see your heart rate distribution during the race. This is interesting to compare from event to event.  See an example below:
    heartrate
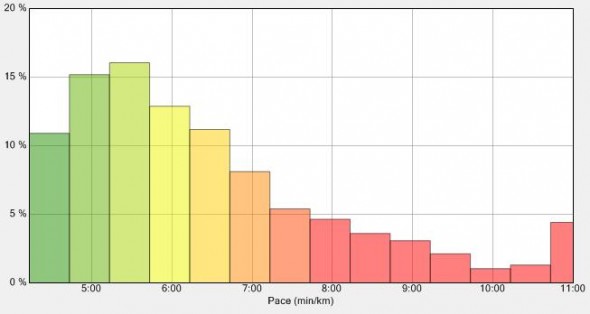
  • Analysis of pace distribution. As for the heart rate histogram, you can also get a pace histogram. This is typically a curve which can be interesting to compare from race to race.
    pacedistr
  • Analysis of special technical trainings. GPS analysis lends itself very well to several types of o-technical exercises. You saw one example with the compass training exercise above. Another exercise is the corridor training exercise – an exercise which has become very popular as more and more runners have access to a GPS unit. With a GPS watch you can fully evaluate your corridor training, by identifying how often you had to step outside the corridor. Evaluation makes it more motivating to improve – use this actively in your training! See below for an example of a corridor training with GPS evaluation. You find some further exercises here in the o-training.net wiki.corr
  • Analysis of map reading duration. Analysis of map reading duration is coming to QuickRoute in a later version.

Equipment for GPS analysis in orienteering

There are a lot of different GPS units which you can use – and most of them give you at least adequate GPS data for analysis. However, there are a few points which you should note,

If you choose a logger, there is significant difference in accuracy based on how you wear it

  • GPS watches are more easy to use, but GPS watches are not allowed in World Ranking events. There you have to use equipment without display, sound signal and without any telecommunications module (i.e. you can not use a GPS tracker, only a logger).
  • You can get very cheap GPS loggers – down to 40 Euro or below. Note however that some of the smallest one have a smaller antennae, and therefore give poorer results.
  • If you choose a logger, there is significant difference in accuracy based on how you wear it. Keep it somewhere where you have as little body shadow as possible – your wrist is a good option.
  • There is significant difference in accuracy for some of the GPS units out there. I give some comments about accuracy in the table below. The Garmin watches are known to all have fairly good accuracy.
  • For best analysis results, use a GPS unit which logs your position every second (frequency of 1 Hz). This gives the best analysis, as it is possible to identify also small mistakes. Note that of the Garmin watches, only the Forerunner 305/205 and the new Forerunner 610 can log the position every second. The other Garmin GPS watches log your position with “smart recording”, which usually means every 3-6 seconds.
  • It may be advantageous to also include the heart rate in your analysis. In this case you should probably use one of the watches which combine GPS data with pulse data (there is also a unit from FRWD which has this combination).
  • In some cases you might also want to analyse your altitude variation. For this you need a GPS with built-in barometric altitude logging – or a separate altitude logging unit which logs altitude using barometric data. Altitude information from GPS data is generally not sufficiently accurate for analysis purposes in orienteering.
  • Data from all GPS units can be coupled to a HeadCam analysis – and also to mapreading analysis with the proper units.
  • You are going to use your GPS a lot – preferably for all high intensity orienteering technical training/competitions. Thus choose a GPS units which makes it possible to have a good “work flow”, i.e. an easy way to upload your GPS data to your computer, and get it ready for analysis in QuickRoute (or another piece of software of your choice).

Based on these considerations, I have set up a set of favourite GPS units for o-technical analysis. Shout in the comments if you don’t agree! The integration of reading from Garmin watches directly in QuickRoute does influence the choice of favourite equipment below. I have also added three different GPS loggers, as loggers are cheaper (possible to buy many for a club), and loggers are your only option for World Ranking events. There are A LOT of GPS logger out there, there might be better options than the one listed here (add a comment if you know about any better) – but the ones listed here are tested by myself or by other orienteers I know.

Table: My favourite GPS equipment  for analysis in Orienteering

Option 1:
Garmin Forerunner 305 (or the 205 which is identical and without a heart rate monitor) Update 19/04/2012! These are unfortunately no longer produced – you might get lucky and get a leftover!
Pros:One of the cheapest GPS watches, has 1 second recording, route can be directly read from QuickRoute. Accuracy similar to other Garmin watches. (see review)

<tr>
<td><span>Garmin Forerunner 405/410/310 XT watches</span></td>
<td>Best tool</td>
</tr>
<tr>
<td><span>Garmin Forerunner 110/210 watches</span></td>
<td>Best tool</td>
</tr>

Cons: Quite big and bulky, especially for a woman. No wireless ANT+ technology (see below), i.e. you have to physically connect the watch to the computer via USB. Old technology. Not to be used at WRE events as all watches.

Option 2:
Garmin Forerunner 310 XT watch – (or maybe 405/410)
Pros: The route is wirelessly transferred to computer when watch enters the room of the computer – can be directly opened in QuickRoute without connecting watch to computer/open other software. Watch is a bit bulky, but still quite compact and good to wear compared to the 305  (405/410 even more compact).  Accuracy similar to other Garmin watches, and the 310XT even has 1 second recording mode with a firmware update. See review of 405 and 410

Cons: The 310 XT might be a bit bulky. For the 405/410: The touch bezel is awkward to use, but this should be improved for the 410 + no 1 second recording mode. Not possible to turn off watch. Not to be used at WRE events as all watches.
Note! I would not recommend the 405/410 due to missing 1s recording mode.

Option 3:
Garmin Forerunner 610 / Garmin 910XT (Updated April 2012)
Pros: Two very good options – both with 1 second recording. The 610 is an all-day watch whereas the 910XT is a watch to be used only for exercise (20 hour battery life). The 910XT has a barometer for altitude logging – thus has a lot more accurate altitude data then the other options.
Cons:  Not to be used at WRE events as all watches. More expensive than the alternatives.
Option 4:
igotU GPS logger
Pros: Very small and light (21 grams) – you can keep it in a headband/Buff during your run. Very cheap (40 Euro or even cheaper). 1 second recording mode.  Allowed to be used at World Ranking Events. Possible to quickly transfer GPX-files to computer using MoTrack software (but still have to connect to USB to transfer) – also quick transfer if you have to administer many units. See review here.

Cons: Accuracy is significantly poorer than the Garmin watches (you get best accuracy  by fastening the GPS unit on your wrist like a watch or by carrying it on your head in a buff/headband, but still a bit from the Garmin watch accuracy). See accuracy comparison sample here. When you loose accuracy, you get track points which are far off, giving you strange spikes and problems with the analysis.  Transfer is not directly integrated in QuickRoute (but you can easily export GPX-files which can be imported in QuickRoute).

Option 5:
Globalsat BT 335 logger
Pros: Many of the same Pros as for the igotU logger, but it is a bit heavier and a bit more expensive. However, the accuracy is superior (see accuracy sample here) – accuracy is approximately as for the Garmin watches. See info about the BT-335 here.Cons: Transfer process to the computer is more awkward (you need to use Bluetooth, i.e. you need a computer with Bluetooth), in my experience with this unit it was not easy to set up transfer from many units.
Note! This might be an outgoing model, so there might be a new model with this high accuracy which I am not aware of (mine is several years old). It is  available here. There is also the DG 200 USB logger from Globalsat which is a bit bigger but should give similar results to the BT 335 and maybe easier transfer to computer.
Option 6:
Photomate 887 Lite
Pros: Very small and light (18 grams). Similar advantages as for the igotU GPS unit, but accuracy is said to be somewhat better (from personal communication, no data to show you for now). Seems to be available online for as low as $30-40.

Cons: Accuracy poorer than Garmin watches and BT 335. I have not personally checked workflow for transferring GPS data to computer, but as far as I have heard it should be possible to be up in QuickRoute in “minutes” using e.g. the BT747 software.
Note! There is also a Bluetooth version of this, but I think I’d prefer the USB version.

In addition to the watches/units in the table above, there are a lot of other options. Some of these are listed in the table below along with some short comments.

Table: Overview of other GPS units.

Garmin Forerunner 110/210 watches The Garmin 110/210 watches are the new “simpler” GPS watches from Garmin. Accuracy should be approximately the same as for the other Garmin watches. However, they do not use ANT+ technology for wireless transfer to the computer, and you can not use them directly in QuickRoute (to my knowledge). Instead you have to make a GPX-file using the bundled software (it comes in the new Garmin FIT-format), and import this GPX-file in QuickRoute. See review of Garmin Forerunner 210 and Forerunner 110. If orienteering is not your main use for the GPS watch, and you want to use your GPS watch as a day-to-day watch in addition, a Forerunner 110 or 210 might be your best option.
Polar GPS watches Polar has a separate GPS unit for their pulse watch. GPS performance and workflow is not as good as for Garmin, so I would rather recommend one of the Garmin GPS watches. I got feedback via email that Polar RS800CX works well, and that it easy to export GPX-files. I’d still recommend the Garmin watches which can be used directly from QuickRoute for the workflow, but if you like to use a Polar watch for the pulse functionality, it is probably a good option to buy the GPS unit for the watch as well.
Nike GPS watch Nike has a new GPS watch which looks nice on paper. However, I would not recommend this for orienteering use as you need to have an internet connection to transfer data from the watch to the computer – and the transfer is done via the Nike servers.
Timex GPS watch Timex has a GPS watch which I would not recommend over the Garmin watches – there is also no direct integration in QuickRoute. I have not tried this watch.
Suunto GPS watch Suunto has some GPS watches which should perform quite well. I have not tested any of these though, and there is no direct integration in QuickRoute.
Globalsat GPS watches Globalsat has several GPS watches. These are often cheaper than the Garmin’s, and said to work quite well. I’d rather take a Garmin though due to the direct import in QuickRoute.
Holux M 1200E logger Quite cheap at DealExtreme. Not the best accuracy, but decent relative accuracy (seems to be a bit better than igotU?)  See accuracy sample here. Could maybe recommend this one.
Qstarz BT-1300S logger Accuracy seems to be not the best. The older BT 1000 is a bit better (but bigger).
Mobile phone You can store your GPS track using an iPhone, Android phone, WM phone, Nokia phone etc. as well. There are a lot of different GPS logger applications for the different mobile platforms, and it is not difficult to find one which can export GPX-files. However, the phones usually gives you less accurate GPS tracks than the dedicated loggers, and the phones are also heavier. It is, however, possible to use a mobile phone as a first test before you buy a dedicated unit.

Software for GPS analysis in orienteering

Although QuickRoute is probably the best available option for orienteering analysis for a single GPS track, I list some of the alternative available software alternatives below along with some strengths/weaknesses for completeness. Note that most software alternatives listed here assume that you are on windows, except for the browser and/or java based.

Table: GPS Analysis for Orienteering: Software overview

QuickRoute Covered above. Best tool for analysis of a single GPS track (see QuickRoute webpage and QuickRoute source code)
3DRerun Still in closed beta, but you can get access by sending an email to 3drerunbeta@worldofo.com. Has some nice replay functionality, but its advantage is mostly for analysis of several runners or for HeadCam video analysis. (see 3DRerun website – password required)
GPSseuranta GPSSeuranta is the “state of the art” tool for GPS tracking within orienteering – being used in a lot of orienteering competitions. Recently GPSSeuranta has also started selling license for a special version of GPSSeuranta for post-race analysis by upload of GPX-files. For analysis of a single runners GPS-track, I would still recommend QuickRoute. See GPSseuranta website.
RouteGadget Nice replay functionality. Geared towards analysis of many runners from a competition. In theory possible to set up for analyzing a competition/training for one runner only, but quite complicated (see RouteGadget website)
RunOway Geared towards analysis of many runners from a competition. Used extensively in Sweden (see RunOway website)
Mapandcoach Should give you some possibilities to analyze GPS data – similarly to RunOway, but I have not had the chance to see it in action yet. Is going to work together with RunOway in 2011 (see Mapandcoach website)
SportTracks The software SportTracks has been used for analysis of GPS tracks for orienteering by some runners for comparison of several routes/runners.
OCAD Some have used OCAD for overlaying their GPS route on the map, but this is not a very effective tool compared to e.g. QuickRoute.
OTrack Similar tool to QuickRoute, but much less possibilities (see OTrack webpage)
OGPS Similar tool to QuickRoute, but much less possibilities (see OGPS webpage).
MoTrack Some of the properties of QuickRoute – geared towards comparing several routes. Not as userfriendly as QuickRoute. I’ve used it mostly to transfer data from igotU units (see MoTrack website here, Norwegian only)
Reources for GPS analysis of orienteering activities

Other resources related to GPS analysis of orienteering activities:

« Previous PageNext Page »